DIY Silicone Candy Molds
Do you ever search the depths of Amazon or Etsy looking for the perfect supplies in order to realize your specific vision for a project? I’ve done this many times. Often at 2 AM and with poor results. When I wanted to find the perfect candy molds to make dino dig-themed cups of dirt for my goddaughter’s birthday party this past summer, I kept striking out. So, I had the crazy idea of trying to make my own. It’s actually way easier than I had originally thought.
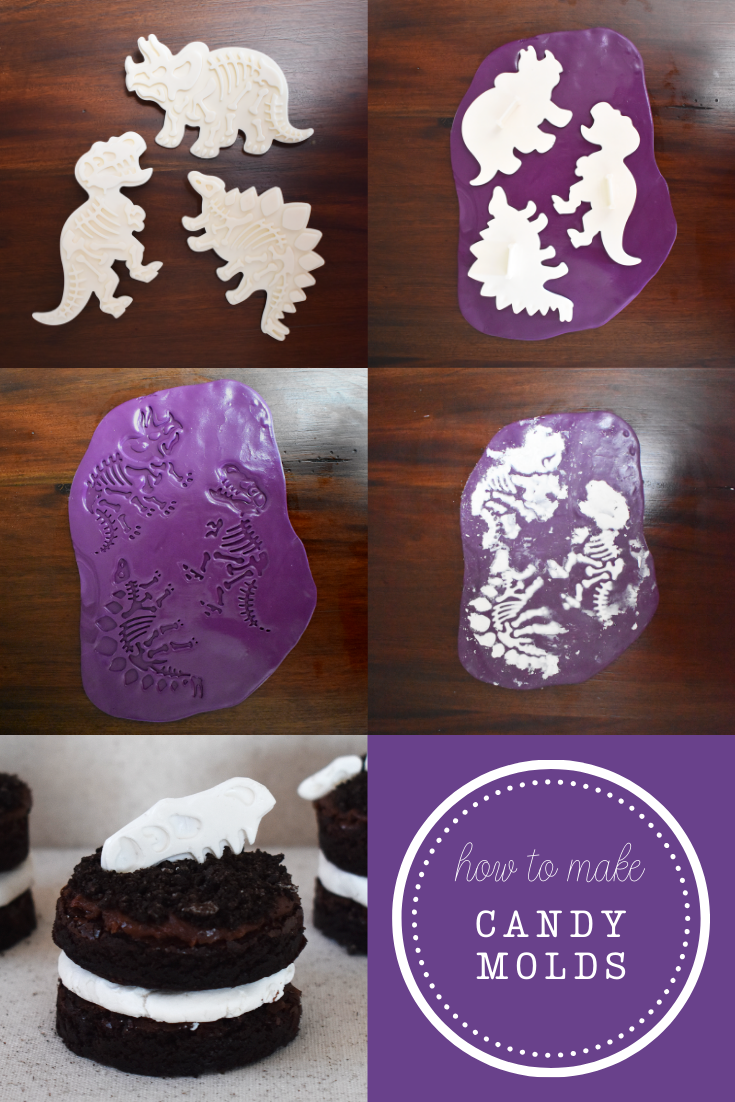
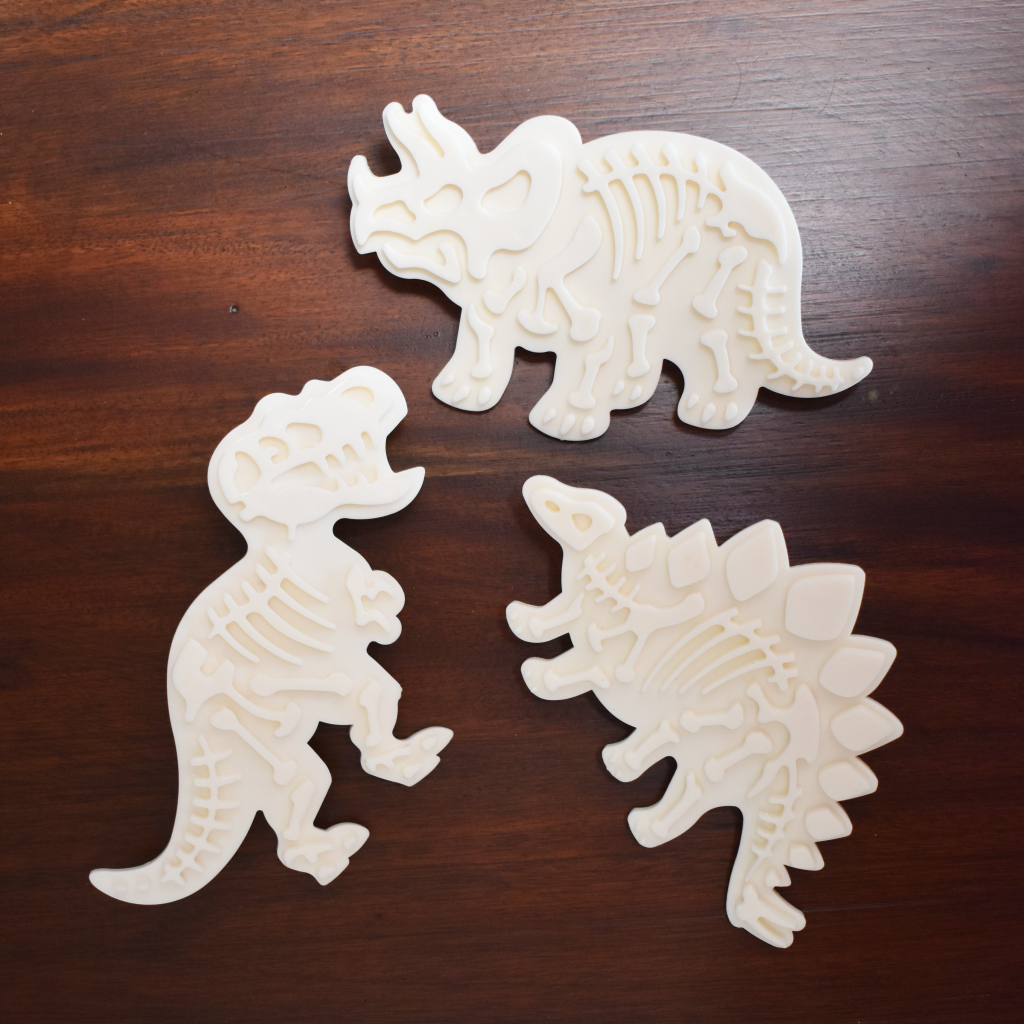
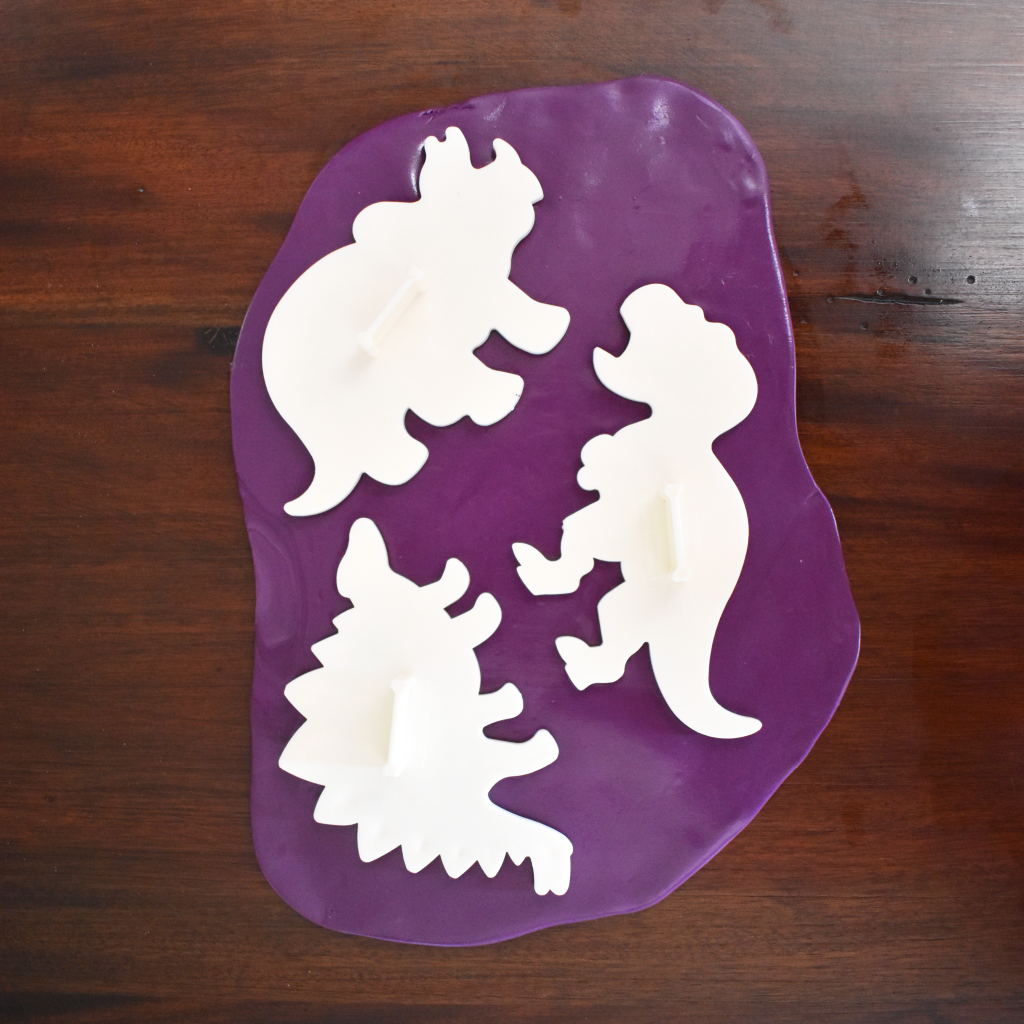
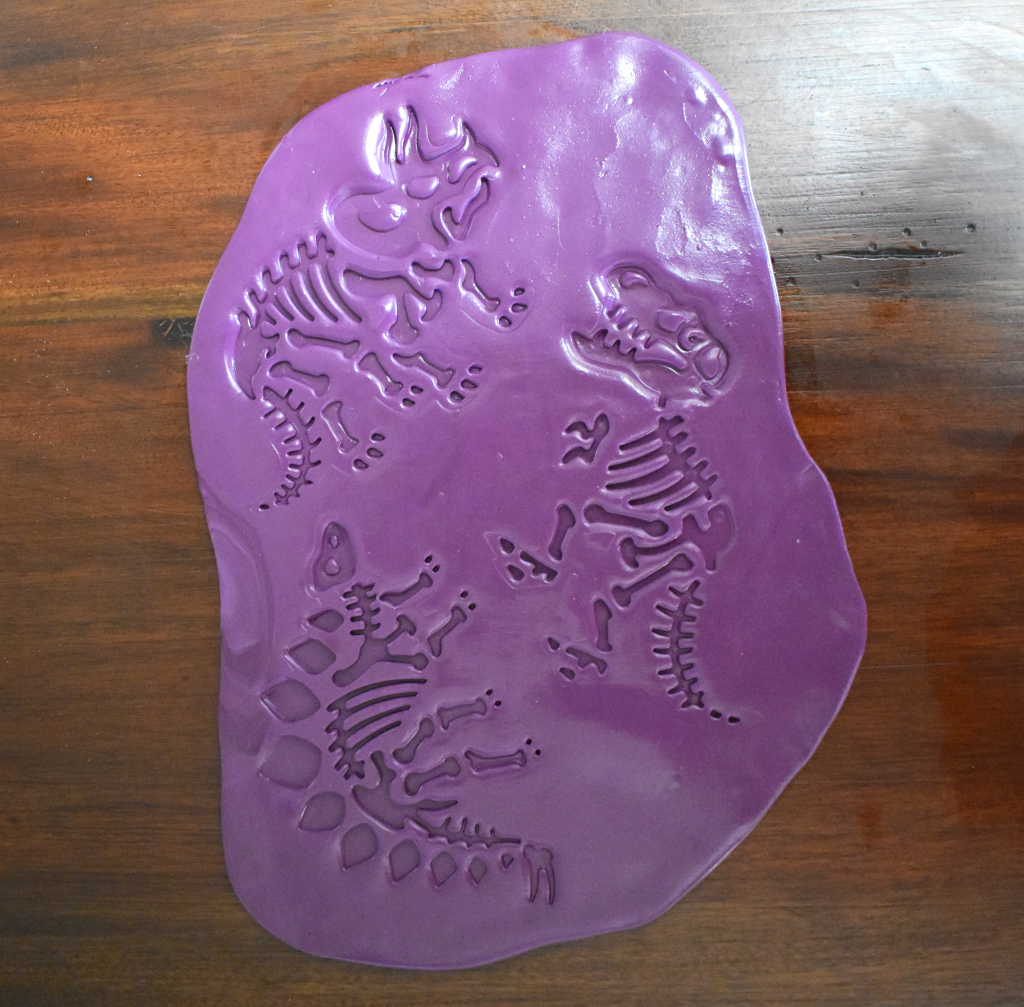
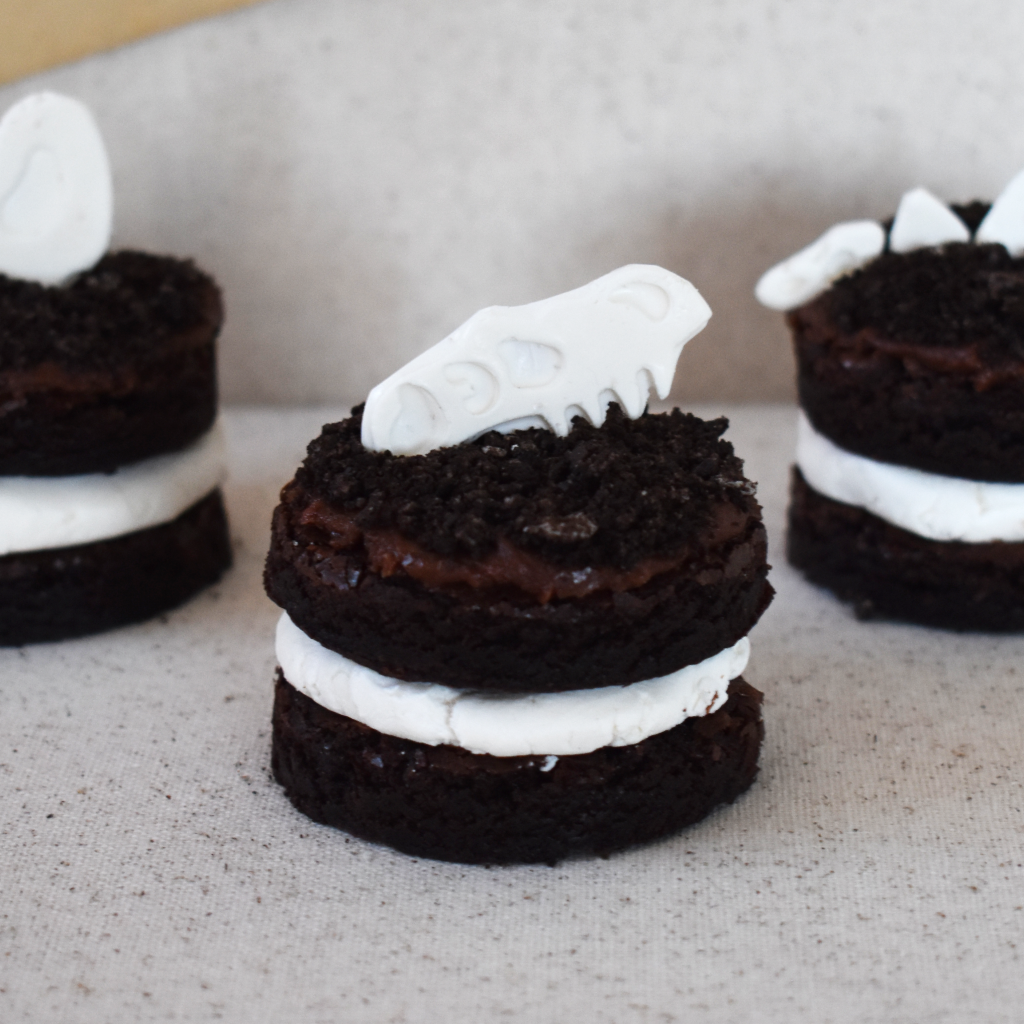
You can use lots of different objects to create molds, but I found some cookie cutters with embossed dinosaur fossils that were perfect for my project. It is important to remember that you need to select objects to mold that have dimensional details so that they will all appear on your chocolate. I also recommend using objects that are not too fine so that you don’t break all of your chocolates. Some of the tiny bones and other elements were too small or thin to be easily removable or recognizable on their own, so I mostly just used the impressions of the dinosaurs’ skulls. They were a big hit at the party!
The full supply list includes:
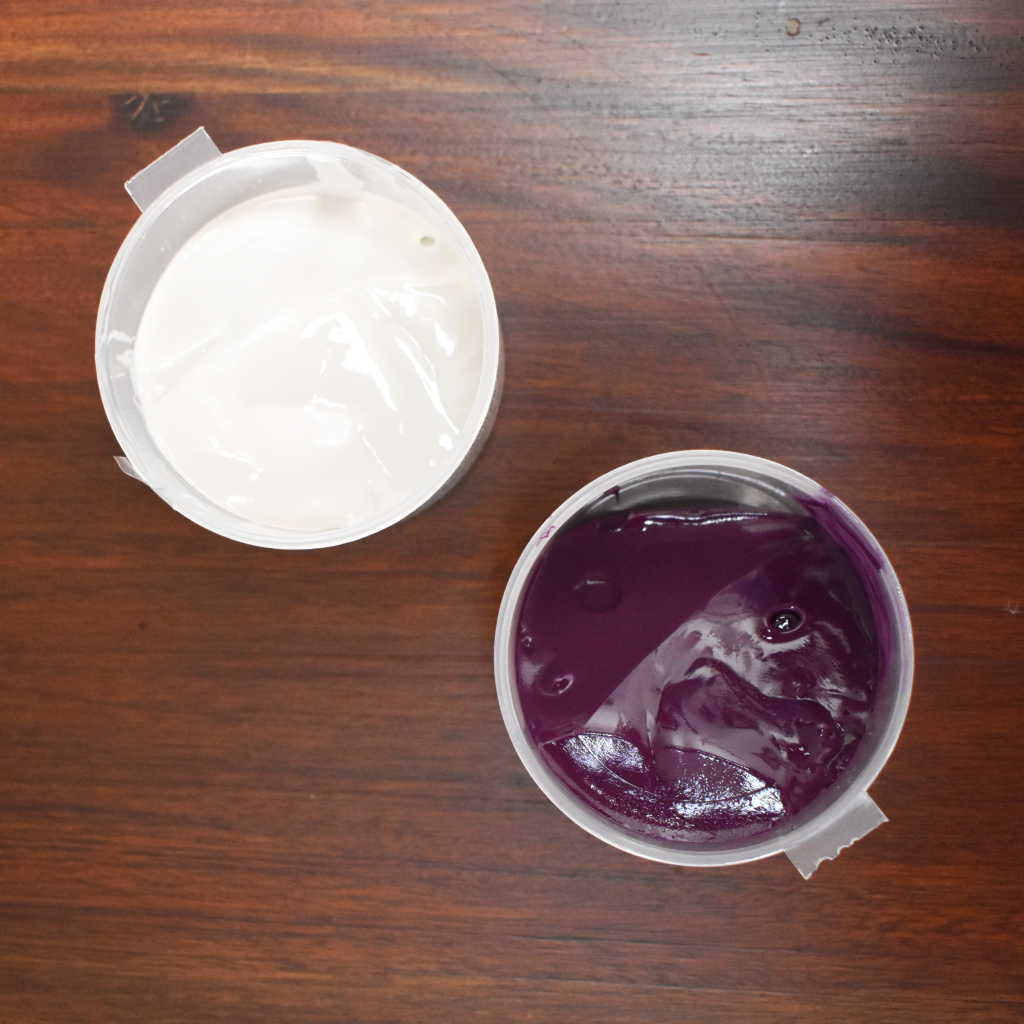
- Food-grade Silicone Putty
- An object you’d like to make an impression of – I used these cookie cutters
- Rolling pin
- Candy melts
- Dough scraper (optional, but may be necessary for fine molds like the ones I made)
- Food-safe craft knife (optional, but may be necessary for fine molds like the ones I made)
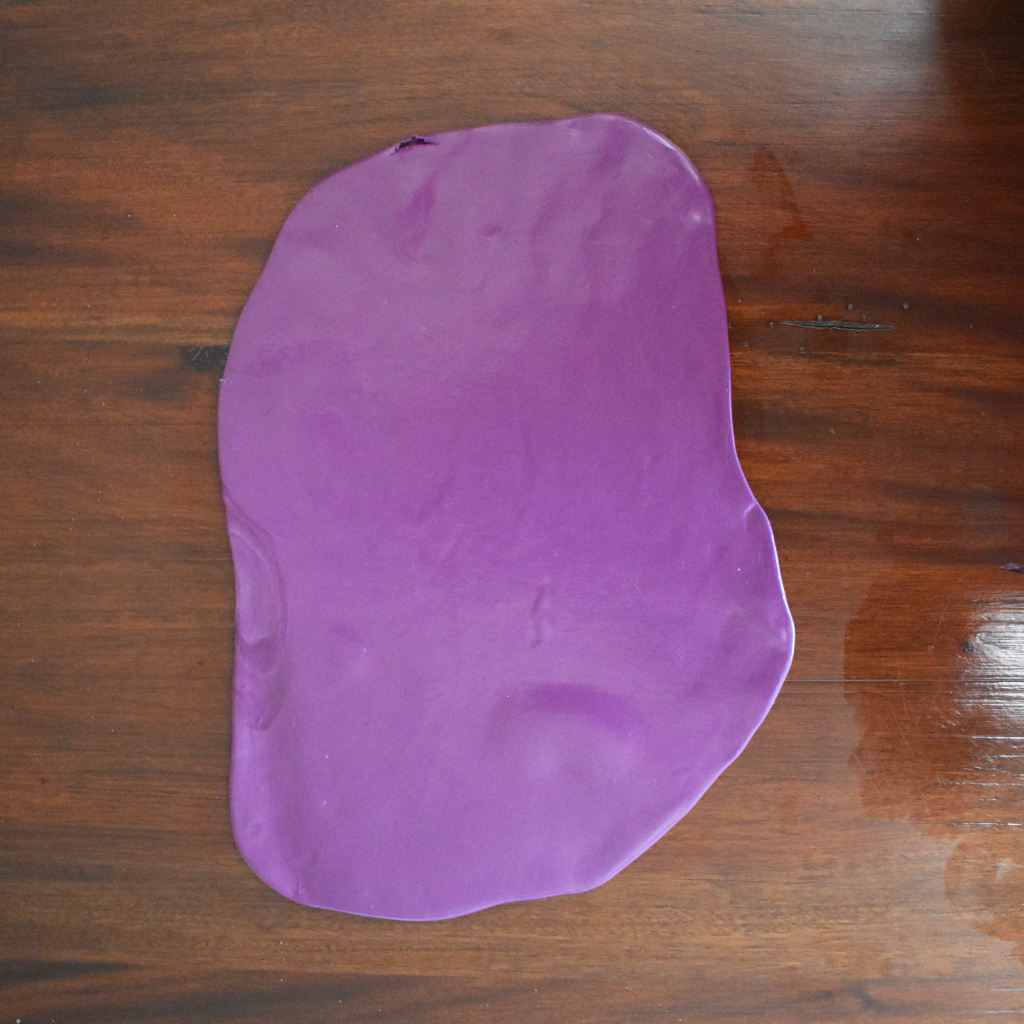
The silicone putty comes in two separate containers. You need to combine them together in order to make your molds. However, you only have 3 minutes to work with your putty once it is combined. So be sure to have all of your other supplies ready to go.
Knead the purple and white putties together until well combined. Roll out the putty using a rolling pin. The depth of your putty depends on the size of your object. I recommend the depth of the object itself plus at least 1/8 inches. For my project, I rolled my putty out to about 3/8 inches.
Press your objects into your putty. Be sure to use equal pressure so that your impression is not distorted. Remove objects promptly after impression is made.
Allow your mold to cure for at least 25 minutes.
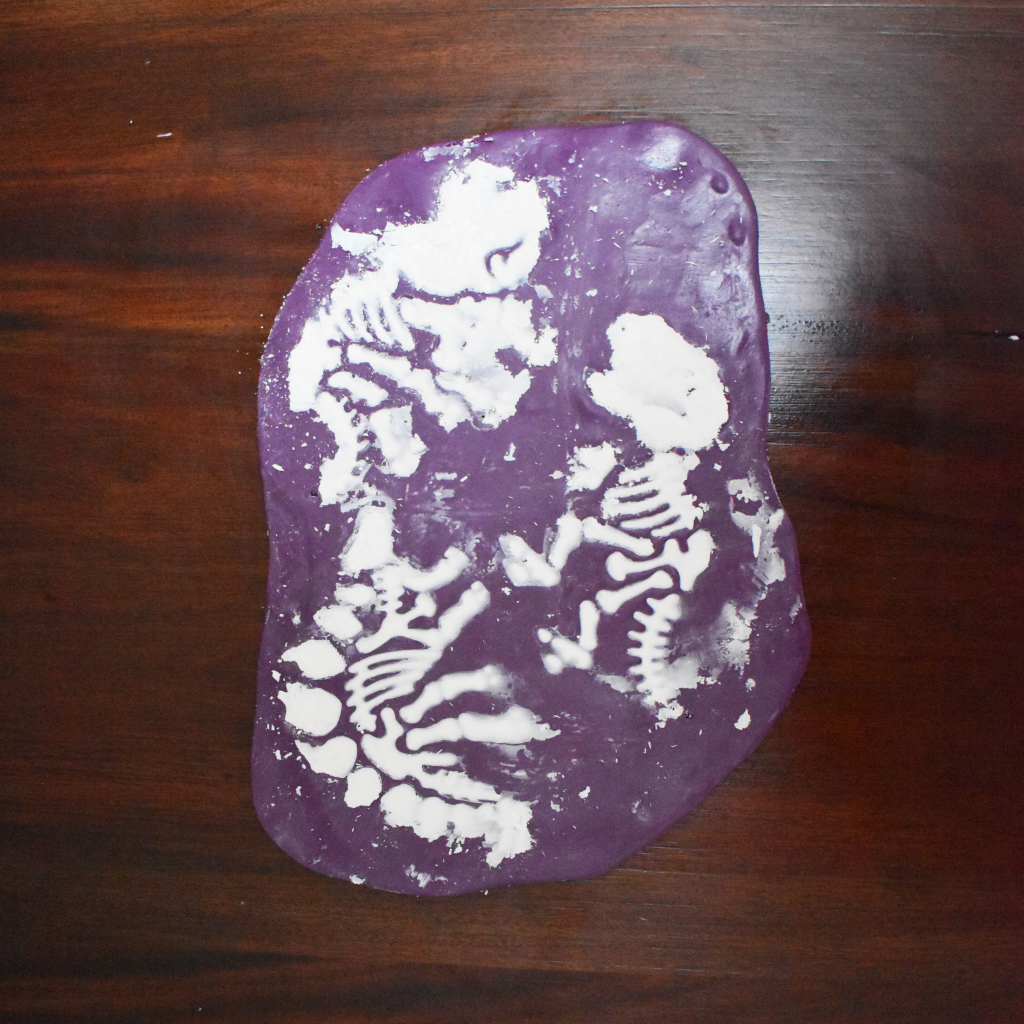
Melt your candy melts according to package instructions. Spoon melted candy into your mold. Use the dough scraper to remove excess chocolate.
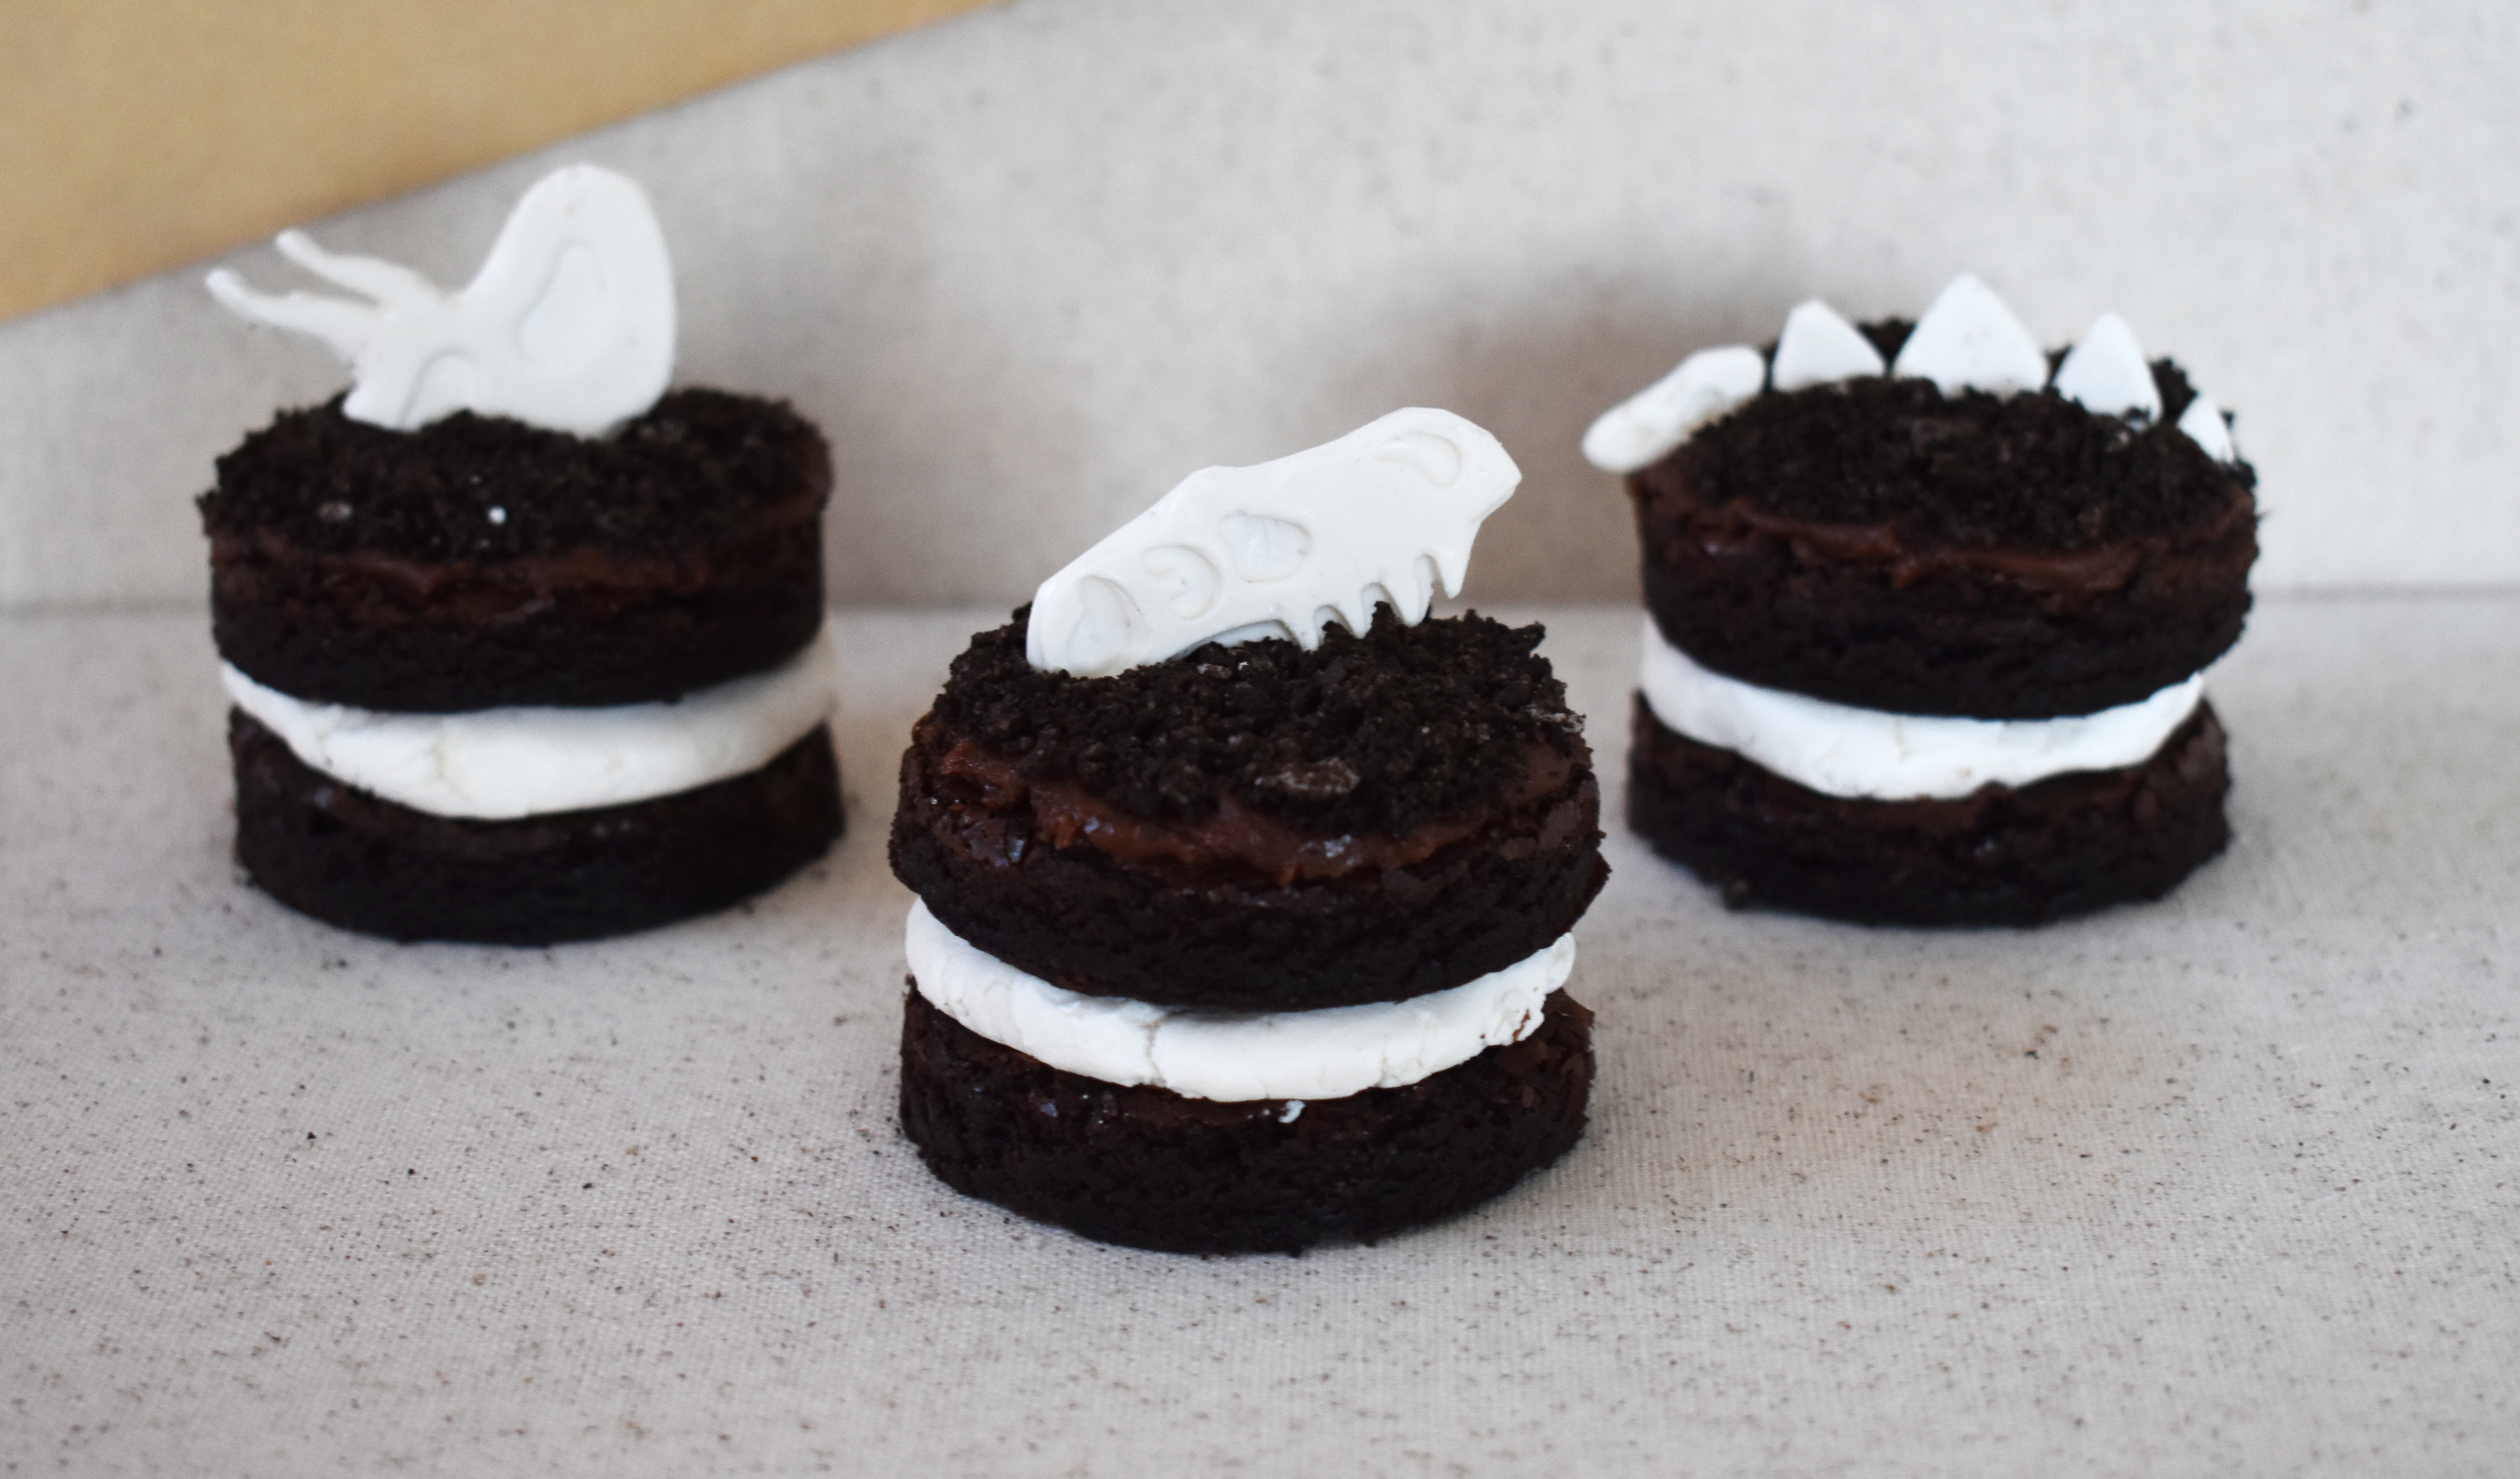
Allow your candy melts to harden (about 5 to 30 minutes depending on the depth of your mold). Gently remove candy from your molds. If necessary, carefully use a food-safe craft knife to trim any excess candy around your shapes. This tends to work best if you place your candy in the refrigerator for about 10 minutes beforehand. I do not recommend putting them in the freezer, because they will become brittle. Use your candy shapes to decorate your favorite desserts!
Be sure to share your creations with me on Instagram at @thewannabegrandma or using #thewannabegrandma!
Note: This post contains some contextual affiliate links. If you purchase any supplies through these links, The Wannabe Grandma receives a small commission. We only include links to products that we truly use and stand behind. Your purchases through our links allow us to continue to bring you great projects and contribute 10% of our proceeds to organizations that help children and youth living in foster care.